Showing posts with label dessert. Show all posts

Monday, 23 March 2015

Dairy-Free Carrot, Cinnamon and Walnut Cake


This was a perfect dinner party dessert last week, a recipe that never fails! Sunflower oil is used instead of butter, which helps keep the cake moist and light. It's delicious served with a yoghurt topping, for those that can eat dairy, or simply dusted with icing sugar or cinnamon.

Ingredients (serves 8)

- 6oz (170g) caster or light brown sugar
- 6oz (170g) sunflower or vegetable oil
- 3 eggs
- 5.4oz (153g) plain flour
- 1/2 tsp salt
- 1 1/3 tsp baking powder
- 2 tsp cinnamon
- 12oz (340g) grated carrot, roughly 2 1/2 large carrots
- 1oz (28g) walnut pieces (or more!) 
* I didn't use raisins this time, but you can add a handful if you feel like it *


1. Heat the oven to 170°c.

2. Mix the sugar and the oil in a bowl and then add the eggs one at a time. * Don't worry if the mixture curdles a bit *

3. Sift the flour, salt, baking powder and cinnamon into another bowl and mix well. Fold the flour mix into the egg mix and stir until combined.

4. Then stir in the grated carrots and walnuts into the cake mix (and raisins if using) and place in a suitable round cake tin with a removable base. 

5. Cook the cake at 170°c for 25 minutes and then turn the heat down to 160°c and cook for a further 20/25 minutes.

6. When the cake is ready, remove it from the oven and leave it to cool for around 10 minutes (otherwise it will deflate in size). Then gently scrape around the sides with a spatular to remove it from the edge. 

* Sieve some icing sugar or grated cinnamon on top for decoration *


Saturday, 7 March 2015

Naughty Chocolatey Brownies


A brownie recipe that never fails! I made these for 30-40 people in the summer and they were a huge hit. The brownie mix is extremely good, so expect to eat half the mix before cooking!

Ingredients (makes 8 very large pieces)

- 100g plain flour (I have made them using gluten-free flour and they're still very good. Next time I want to try ground almonds)
- 250g unsalted butter
- 300g caster sugar or soft brown sugar
- 1 tsp baking powder
- 75g good quality cocoa powder
- 4 eggs
- 100g plain chocolate or white chocolate (drops or from a bar - not too dark unless you like rich brownies), mashed into small pieces

1. Start by turning the oven to 180°c. Cream the butter and sugar in a mixer for a few minutes and then gradually add the eggs one at a time.

2. Add the flour, cocoa powder and baking powder and blitz until smooth. 

3. Stir in the chopped chocolate drops or pieces and then place in a suitable lined square cake tin.

4. Put the brownies on the floor of the oven for 25 minutes and then turn the oven down to 140°c (simmering oven) and bake for another 20 minutes in the centre of the oven.

* If you have doubled the mixture, then 40 minutes for baking and 35 for simmering * Try adding chopped nuts or raspberries for someting different *


Thursday, 12 February 2015

Easiest Chocolate and Peanut Butter Cups for Valentine's Day


With very little prep and hassle, you can make these sweet tasty bites and wow the special someone on the receiving end. Unfortunately this post is going to ruin my surprise, but I wanted to share these with you before Valentine's Day on Saturday. They are probably the quickest tasty treat I have ever made...and cheap too, with only 4 ingredients! They are not the healthiest things however, but who doesn't like a naughty something once and a while.

Ingredients (makes 8 large chocolates)

- 400g chocolate, around 52% cocoa (very cheap from Lidl!)
- 2 tbsp smooth peanut butter (or dairy free nut butter if preferred)
- 1 tsp maple syrup or natural sweet syrup such as 'Sweet Freedom'
- goji berries to decorate

You will need silicone moulds, so that the chocolates come out easily. Mini cupcake cases would also work.

1. Place all of the chocolate into a glass bowl resting on a saucepan with a little water in it. Heat up the saucepan to melt the chocolate, stirring occasionally. When the choc is melted, after around 3 minutes, pour a little into your moulds - about 1 1/2 tbsp each depending on the size of your mould, or 1/2 tsp if using mini cupcake cases. 

2. Put the chocolate in the freezer for a few minutes while you prepare the peanut butter filling.

3. Mix together the peanut butter and sweetner. If you find it won't mix, heat it up a little in a pan. 

4. By this time, the chocolate in the freezer should be nice and hard. Remove is and spoon one tsp of peanut butter filling in the centre. Return them to the freezer for another few minutes.

5. If the chocolate that was heated up has gone a bit hard, pop it back on the hob to heat it up.

6. Finally, once the peanut butter filling has hardened, remove them from the freezer and place another 2 tbsp of chocolate on top, levelling the cups out as much as possible. Decorate with a few goji berries, nut sprinkles or rose petals before returning them to the freezer for a final set - around 2 hours. 


7. If you have used silicone moulds, the chocolates should pop out extremely easily. The outside should be nice and hard, and the centre all gooey and delicious.

Extremely quick and scrumptious - ENJOY!


Tuesday, 22 July 2014

Elderflower and Lemon Ice Cream


I made this ice cream (Belvoir Fruit Farms website) over the weekend and had to make it again today it was so delicious. It's very light and creamy, with a bit of zing; and tastes great with my carrot cake: http://ohuntingford.blogspot.co.uk/2014/01/ive-made-this-cake-few-times-and-its.html

Ingredients (serves 6)

- 3 egg white
- 2 oz caster sugar
- 3 egg yolks
- 7 tbsp elderflower cordial
- zest or peel of one lemon
- 300ml double cream

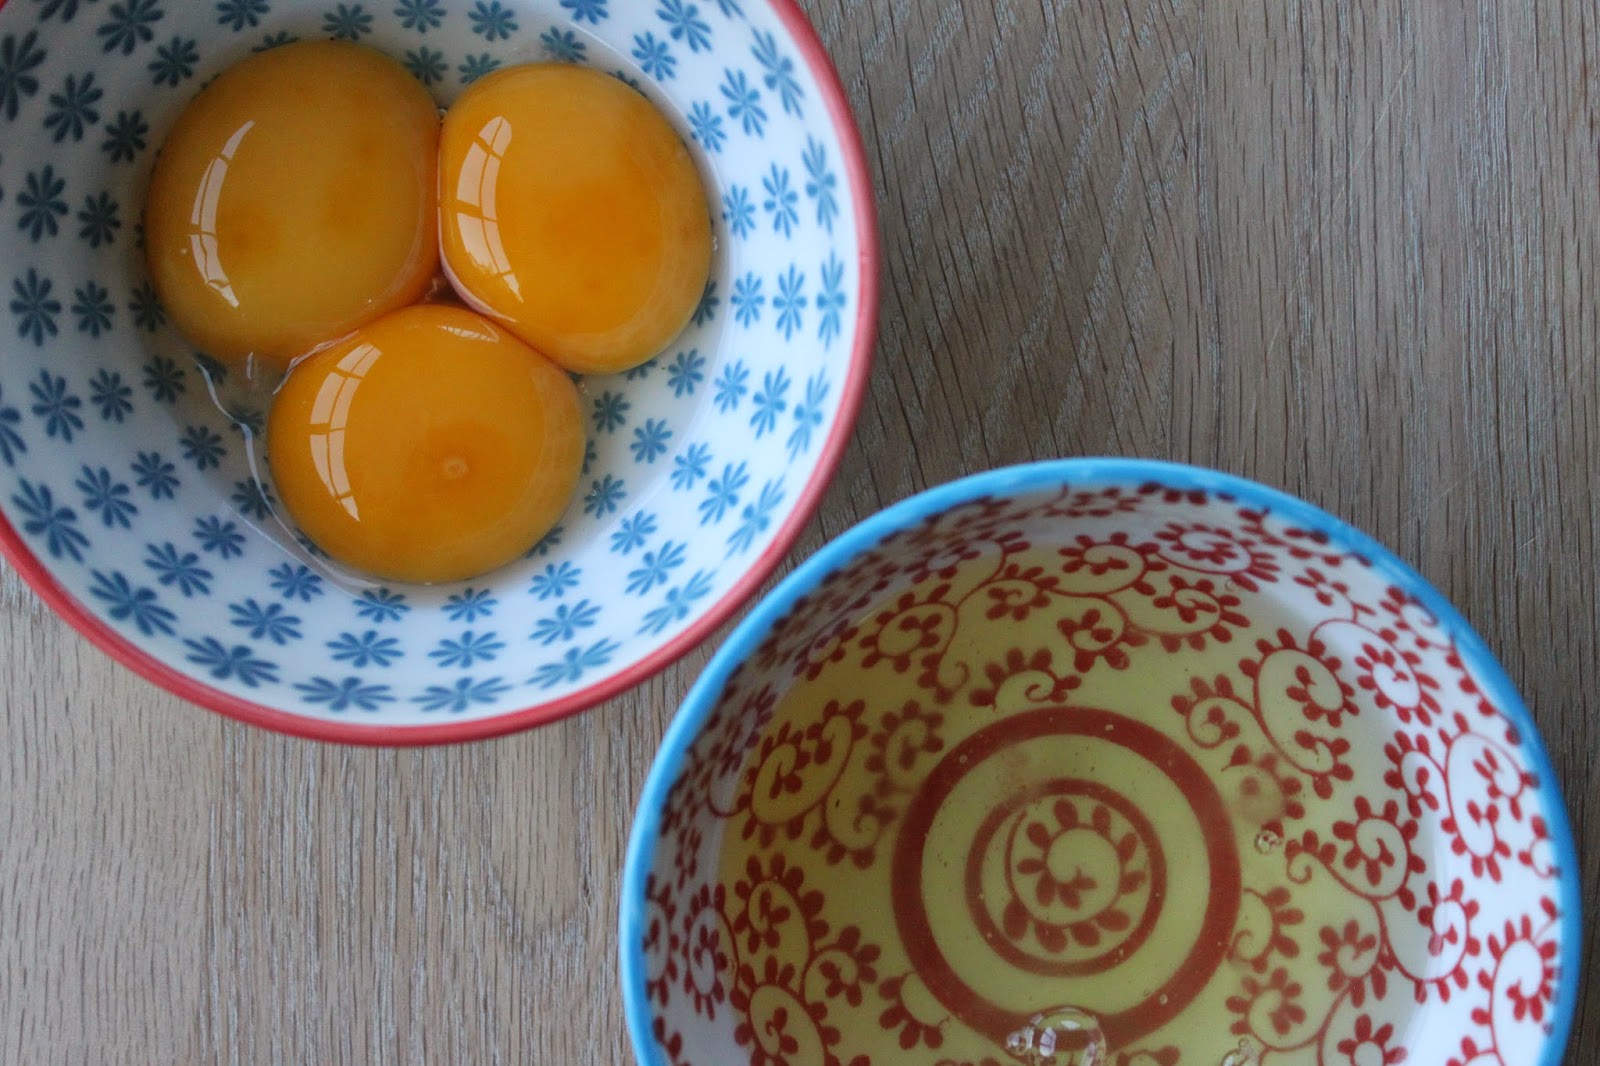
1. Start by separating the eggs into two bowl (one with whites and one with yolks).


2. Beat the egg whites until fluffy and then gradually add the sugar.

3. Next, lightly beat the egg yolks (until they start to get thick) and then mix in the elderflower cordial and lemon peel.

4. To finish, whip up the cream and fold the egg mixtures into it. 

5. The ice cream can either be placed into a tupperware and popped in the freezer overnight, or poured into an ice cream maker until set. 


Sunday, 20 July 2014

Amaretti, Almond and Chocolate Cake


This recipe is from Yummly.com and makes a great alternative birthday cake. It is absolutely delicious and slightly healthier than normal chocolate cake because it doesn't contain added flour. 

Ingredients (serves 8-10)

- 1 1/4 cup of amaretti biscuits (about 25 small ones)
- 3/4 cup almonds
- 1/4 tsp cinnamon
- 1/2 a cup of unsalted butter, softened (about 100g)
- 1/2 cup granulated sugar
- 4 eggs
- 8 oz good quality chocolate, melted
- 1 1/2 tsp vanilla essence

1. Start by preheating the oven to 180°c and greasing a 9" cake tin.

2. Place the amaretti biscuits and almonds in a food processor and whizz until a fine meal forms. A bit of crunch is good! Put this mixture into a bowl, stir in the cinnamon and set aside.


3. Heat a little water in a small saucepan. Put a bowl on top of the saucepan and make sure that it doesn't touch the water. Break the chocolate into the bowl and stir until it's melted. Leave this to cool while you finish the rest of the cake.


4. Cream the butter and sugar in a food processor for a couple of minutes. Slowly add the eggs one at a time (with the motor running), and scrape down the sides with a spatular. 

5. Finally add the almond mixture and melted chocolate to the food processor, and stir in the vanilla essence. 

6. Pour the cake mixture into the prepared tin and bake in the oven for 30 minutes. 

For the topping, I mixed melted chocolate with a little cream and icing sugar, but you can also dust it with coco powder. This cake is great with creme fraiche, yoghurt and fruit.

Monday, 27 January 2014

Easy Peasy Apple Tarte Tatin


I'm not sure where this recipe originated from, but I've been using it ever since I can remember. This time, I added one teaspoon of cinnamon and it definitely added something extra.

Ingredients (serves 8)

- 5 large cooking apples, peeled, cored and thinly sliced into half moon shapes
- 3 tbsp soft brown sugar
- 1 tsp cinnamon
- 50g unsalted butter, chopped into pieces
- 250g pack of puff pastry

1. Start by setting your oven to 180°c.

2. Sprinkle the brown sugar and cinnamon into the bottom of a round medium-sized flan dish. Then add the chopped butter evenly on top it. 

3. Arrange your apple pieces beautifully, working from the outside in. Remember, the tart is going to be turned upside down once it's cooked, so make the first layer look pretty.

4. Once you have covered the dish with apples, place it in the oven for 5 minutes to soften up a little.

5. Meanwhile, you can roll out the pastry onto a lightly floured surface to roughly 1cm. Not too thick and not too thin. 

6. Remove the apples out of the oven and lay the pastry on the top of the dish. Cut around the top of the dish so that the pastry fits neatly on the apples. 

7. Place the tart in the oven for 25-30 minutes, until the pastry turns golden brown.

8. At this stage, you'll probably just want to tuck in, but you must wait a few minutes before turning the tart upside down. Scrape around the edges of the dish with a knife or spatula to unstick any excess pastry. Then place a large plate (bigger than the dish) over the pastry and turn the tart back onto the plate.

This pudding is best served hot, so either eat is straight away or bang it in the microwave to warm up for a minute. Don't over do it though, or it'll go soggy. Enjoy with yoghurt, ice cream or creme fraiche.


Thursday, 23 January 2014

Extremely Light and Healthy - Gluten Free Lemon and Almond Cake


This one's an old favourite. Passed to me by a dear friend who is gluten intolerant, it always gets great feedback. I made it for my parents to take on a shooting weekend, hence the flying bird. Sadly there was none left for me...

Ingredients (serves 8-10)

for the cake -

- 6oz almonds, blitzed in a food processor to your required consistency (I like to leave them slightly crunchy and not like breadcrumbs) or ground almonds
- 5oz caster sugar
- 4oz butter
- 3 large eggs
- 1/2 tsp almond essence (pretty essential)
- zest of 2 lemons

for the icing -

- 3oz icing sugar
- juice of 1/2 a lemon

1. Heat the oven to 170°C.

2. Beat the butter and the sugar together in a bowl or food processor and then add the eggs one at a time. 

3. Finally, spoon in the ground almonds, lemon zest, and essence to form a good cake consistency.

4. Pour the mixture into a cake tin and bake in the oven at 170°C for 25-30 minutes, until it is cooked right through.


5. When the cake is cooked, take it out of the oven and leave it to cool for a few minutes. Place it onto a large plate, or straight into a cake tin and pour on the icing (juice of half a lemon added to the icing sugar) while the cake it still warm. 

6. Serve either cold or hot.


Dairy-Free Carrot Cake


I've made this cake a few times and it's super scrumptious. Usually I top it with a yoghurt glaze but I wanted my dairy-intolerant friend to be able to eat it. This is a tweaked version of a recipe my mum found.

Ingredients (serves 8-10)

for the cake -

- 6oz caster sugar
- 6oz vegetable oil
- 3 eggs
- 5.4 oz plain flour
- 1/2 tsp salt
- 1 1/3 tsp baking powder
- 1 1/2 tsp cinnamon
- 12oz grated carrot, roughly 3 large carrots
- 1oz walnuts (or more!)

for the icing - 

- half cup thick soya yoghurt or Total yoghurt for those that can eat dairy
- 2 tsp golden syrup
- 1/2 tsp vanilla essence

1. Heat the oven to 170°C.

2. Mix the sugar and the oil in a bowl and then add the eggs one at a time. 

3. Sift the flour, salt, baking powder and cinnamon into another bowl and mix well. Add the flour mix to the egg mix and stir until combined.

4. Then fold the grated carrots and walnuts into the cake mix and place in a suitable round cake tin. 

5. Cook the cake at 170°C for 25 minutes and then turn the heat down to 160°C and cook for a further 20/25 minutes.

6. This cake is delicious with or without icing, so it's up to you. If you're opting for icing, put the yoghurt, syrup and essence together and leave it in the fridge until the cake is ready and has completely cooled. It is important to leave the cake to cool, otherwise the yoghurt will melt on top of it.

7. Cover the cake with the icing and decorate with a sprinkle of cinnamon, walnuts or grated carrot.


It is however perfectly good without icing, and much healthier! The plain version would serve as a great tea accompaniment. 

Saturday, 5 October 2013

Apple and Prune Crumble


There were some leftover tinned prunes that needed eating, and tonnes of windfall apples in the garden, so this crumble was a serious experiment. Having searched 'Apple and Prune Crumble' online, I wasn't successful. Therefore this might be the only recipe out there!

Ingredients (serves 8)

for the crumble base -

- 4 small/medium apples, peeled and chopped
- 7 tinned prunes, pitted
- 2tsp water
- 4 tsp prune juice from tin
- 1 dessert spoon golden syrup
- 1 tsp cinnamon

for the crumble topping - 

- 170g plain flour
- 75g demerara sugar
- 25g porridge oats
- 75g unsalted butter, softened
- 10g goji berry flaxseed (optional)
- 10g pumpkin seeds
- 1 tsp cinnamon

1. Start by pre heating the oven to 180°c. Choose a suitable dish and place the apples inside. Cover them with the water, prune juice and golden syrup, then stir. Finally, sprinkle over the cinnamon and place the prunes on the top.


2. Place all the ingredients for the crumble topping into a bowl and blend with your hands until the butter has broken into small bits and combined with the mixture. (Tip - Your fingers should be dirty and your palms should be clean. Lift the mixture up with your finger tips to let the air in).

3. Once the crumble topping is ready, pour it evenly over the crumble base.


4. Put the crumble in the oven and cook for 30-40 minutes until golden. Serve how you wish - hot or cold.


Friday, 27 September 2013

Scrumptious September Blackberry Tray Bake


After a stinted start to September blackberries, a delicious bowl was finally picked. This is the best blackberry recipe I have made to date, and I wanted to share it's scrumptiousness with you all. Due to the fact that blackberries don't cost a penny, the apple was from our garden, the free-range eggs were bought down the road for next to nothing, and the rest of the ingredients equate to as little as £1, this is a highly economic and cheap cake! Unfortunately it is not my own creation, I nabbed it from the Tesco Mag website, the original recipe can be found here: http://img.tesco.com/todayattesco/cookbook/archive/apple_blackberry_tray_bake.shtml 

Ingredients (makes 12 pieces)

- 100g softened butter
- 175g self-raising flour
- 1tsp baking powder
- 170g caster sugar
- 2 eggs
- zest of one lemon
- 1 Cox apple, peeled, cored and diced (or as an alternative you can use tinned pears, around 4 pear halves)
- 150g blackberries, rinsed

1. Start by preheating the oven to 190°c and line a shallow 20cm square cake tin with baking parchment (I used a glass 20 x 15cm dish instead). 

2. Place all the ingredients, apart from the apple and blackberries, into a large bowl and mix with a wooden spoon until smooth.

3. Next, stir the apple and blackberries into the mixture and spread evenly into the prepared tin. Bake for 30-40 minutes, until the centre is firm to touch and a knife comes out clean.

4. Remove the cake out of the tin by picking out the baking parchment, and leave to cool on a wire rack.

http://instagram.com/p/em3Mgyuks1/


Friday, 13 September 2013

Banana and Stem Ginger Muffins with a Whole Lot of Seeds


After finding this recipe on the Waitrose website, I decided that I had to make them, even if it was 8pm. While beginning to make these delicious muffins, I noticed that I was missing a few ingredients. I substituted chocolate drops, orange zest and poppy seeds for linseeds, pumpkin seeds and sunflower seeds. I love the rustic, homemade quality of using parchment paper for muffin cases...I think it adds character and flair. 


Ingredients (makes 12 muffins)

- 250g plain flour
- 120g caster sugar
- 1 1/4 baking power
- 1/2 tsp bicarbonate of soda
- 1 tsp ground ginger
- 1 egg
- 3 tbsp vegetable oil
- 200g natural yoghurt
- 2 balls stem ginger, roughly chopped
- 2 bananas, peeled and sliced
                                                                                                         - 1 tbsp sunflower and pumpkin seeds
                                                                                                        - 1 tsp linseeds


1. Preheat the oven to 190°c.

2. Start by sifting the flour, sugar, ground ginger and raising agents into a bowl with a few pinches of salt, and stir well. 

3. In another bowl lightly beat the egg, oil and stem ginger. Stir in the mixed dry ingredients until combined and fold in 1 1/2 chopped banana.

4. Cut some baking parchment into suitable squares and fit them into a cupcake holding try by folding them slightly. Divide the mixture evenly between the 12 muffin cases (N.B it might get messy). Then use the remaining 1/2 chopped banana, pushing a piece into the centre of each muffin. 

5. Bake in the oven for 20-25 minutes, until a skewer comes out clean from the centre. Leave the muffins to rest and cool on on a wire rack or tray. 

They are delicious either hot or cold, in the morning for breakfast or with a nice afternoon cuppa.

http://instagram.com/p/eIYSdZukg1/


Monday, 29 July 2013

Insanely Delicious Pavlova Berry Ice Cream


This is my mum's creation, what a gem!  It's the easiest and quickest ice cream you will ever make.

Ingredients (serves 6)

- 1 Coop Berry Pavlova (or a similar equivalent)
- 3 meringue nests
- 5 handfuls of frozen/fresh berries, currants, or summer fruits (I used black currents and damsons)

1. Start by whizzing up the pavlova for 10 seconds in a magimix.


2. Then add the fruit and extra meringue. Whizz up until a smooth mixture forms.


3. Add some more fruit if you feel it needs some. Either place the ice cream straight in the freezer, or keep it in the fridge until 4 hours before serving, then place in the freezer. This way, it will still be slightly soft and more like a sorbet. 


This ice cream is great served with my Chocolate and Amaretti Cake (see posts below for the recipe).

http://instagram.com/p/cJ5CsIukp9/